
Since the last 15 years, millions of web developers are using ASP.NET Framework to build and run robust, scalable, and user-friendly web apps. And since those last 15 years, Microsoft has added new capabilities to their .NET framework consistently, latest being the new ASP.NET Core. ASP.NET Core is basically a re-form of ASP.NET MVC framework, designed to build modern, cloud-based web applications. It is a high-performance, open-source, cross-platform web app development framework created by Microsoft and its community.
The new ASP.NET Core framework is designed to provide a more optimized development framework for web application development that is to be deployed on cloud or run on-premises. It is made up of modular components with minimum overhead, helping developers retain greater flexibility while developing large-scale applications. In this tutorial, we will learn how to implement CRUD (Create, Read, Update, Delete) operations in the new ASP.NET Core.
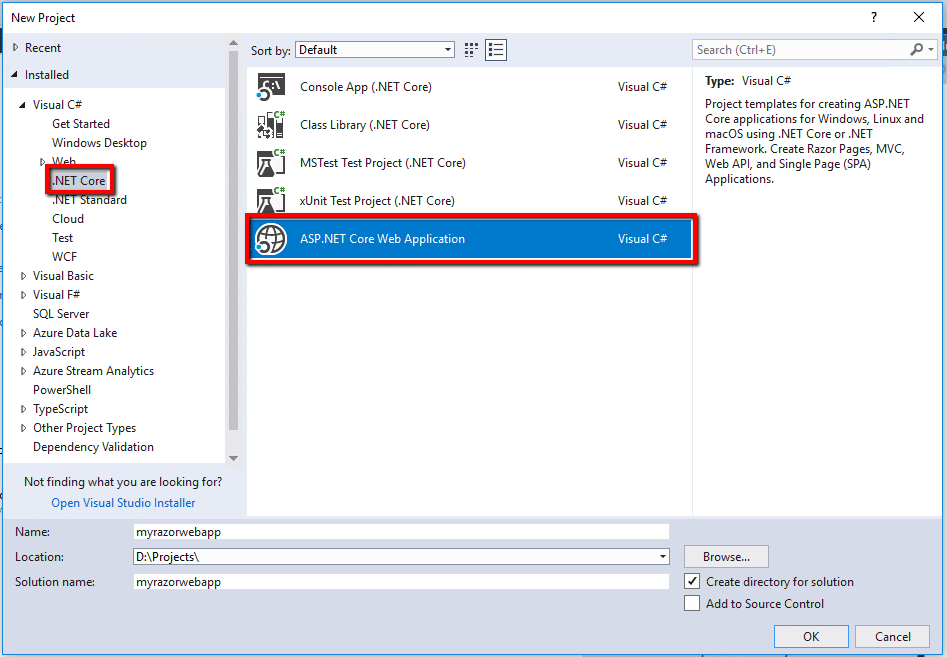
Select the ASP.NET and web development workload.
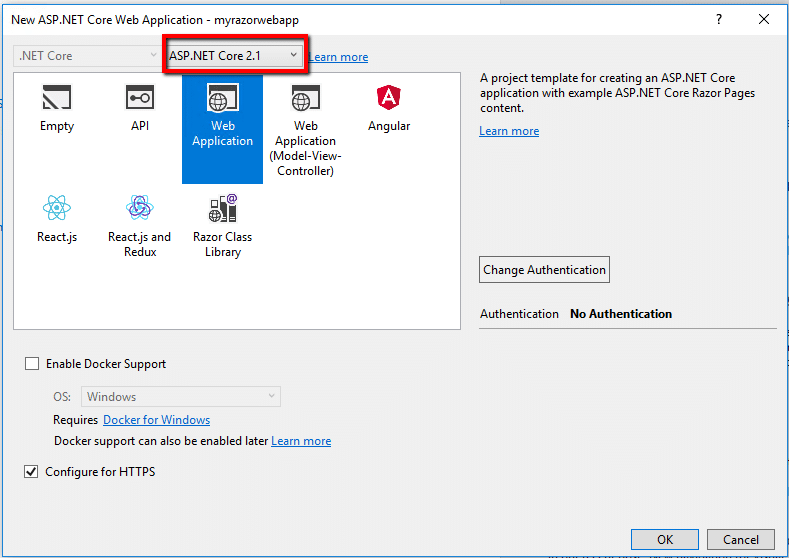
.Net Core 2.1 SDK
If you want to create the Razor app using CLI command, then run the following command in the PowerShell targeting your project folder.
dotnet new
This will give you the list of apps the available template for dotnet core.
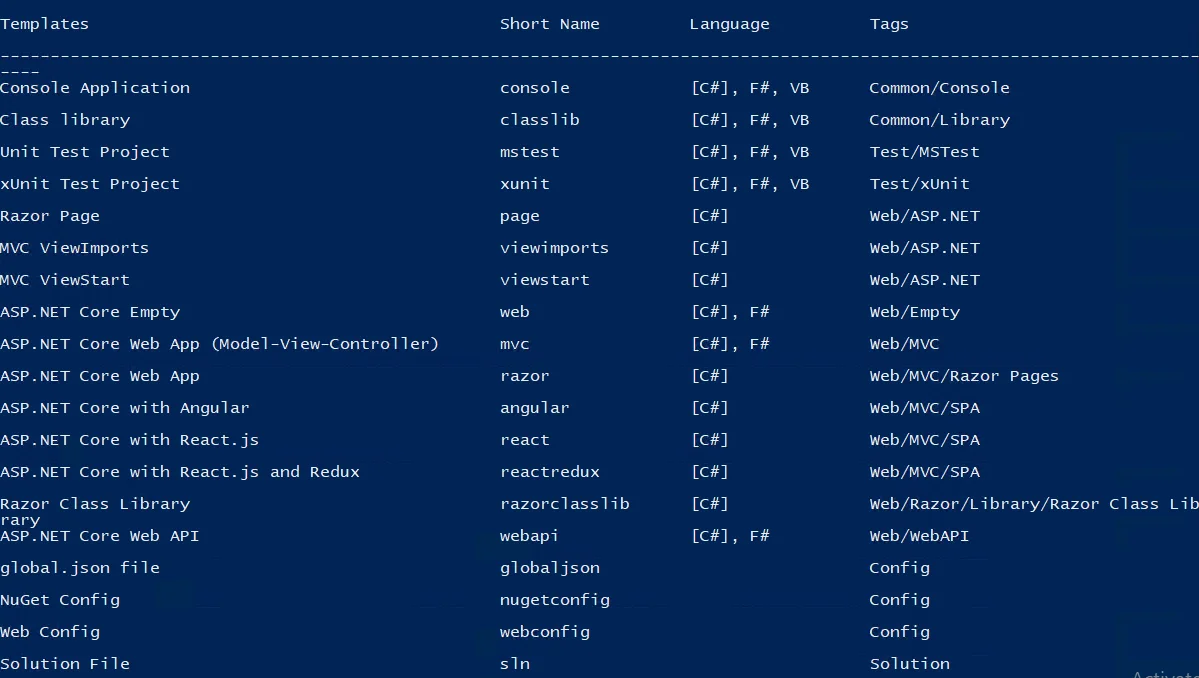
You can select one, here in our case as we are creating Razor app, so we will use dotnet new webapp (you can always use –help after any CLI command to check for options).
With this command, it will create the application on target folder but, we also want to give the name and create a directory for the same name and to do so use below command.
dotnet new webapp –o mywebappHere, mywebapp is the name of the directory in which CLI create the razor page application.
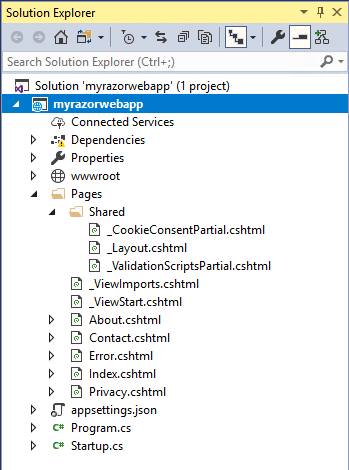
The Visual Studio template creates a starter project:
Press F5 to run the application. The following image shows the app.
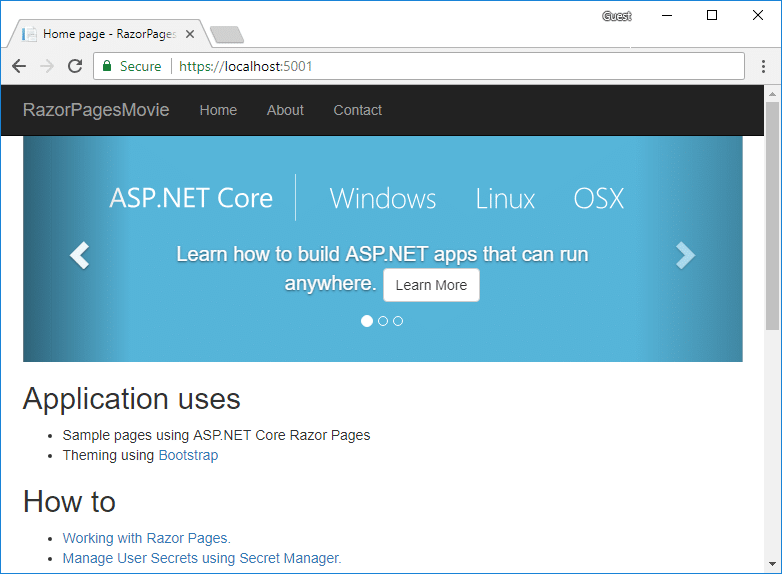
Visual Studio starts IIS Express and runs the app. The address bar shows localhost:port#
The following table lists the files and folders in the project. For this tutorial, the Startup.cs file is the most important to understand. You don’t need to review each link provided below. The links are provided as a reference when you need more information on a file or folder in the project.
| wwwroot | : | Contains static files. i.e. js, css, images |
| pages | : | Folder for Razor pages |
| appsettings.json | : | Configuration file |
| Program.cs | : | Configure the host of the ASP.NET Core application |
| Startup.cs | : | Configures services and the request pipeline |
Razor Pages is enabled in Startup.cs:
public class Startup
{
     Public void ConfigureServices(IServiceCollection services)
     {
          // Includes support for Razor Pages and controllers.
          services.AddMvc();
     }
     public void Configure(IApplicationBuilder app)
     {
            app.UseMvc();
     }
}
Consider a basic page:
@Page

<h2>Hello, world!</h2>
<h3>The time on the server is @DateTime.Now</h3>
The preceding code looks a lot like a Razor view file. What makes it different is the @page directive. @page makes the file into an MVC action – which means that it handles requests directly, without going through a controller. @page must be the first Razor directive on a page. @page affects the behavior of other Razor constructs.
Notes:
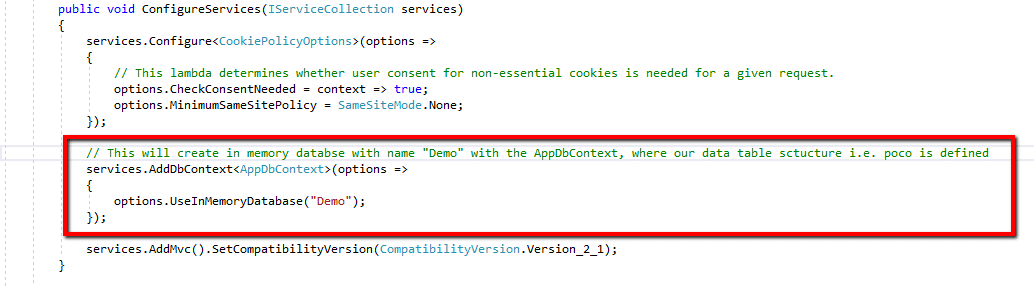
For the samples in this document, the DbContext is initialized in the Startup.cs file. We are here using UseInMemoryDatabase, which will create a database with the given name in memor. So, if we stop the application all data will be gone.
The db context:
using Microsoft.EntityFrameworkCore;

namespace myrazorwebapp
{
     public class AppDbContext : DbContext
     {
       public AppDbContext(DbContextOptions options) :base (options)
      {

      }

      public DbSet<Customer> Customers { get; set; }
      }

}
The Data Model:
using System.ComponentModel.DataAnnotations;

namespace myrazorwebapp
{
    public class Customer
    {
        public int Id { get; set; }
        [Required, StringLength(100)]
        public string Name { get; set; }
    }

}
Here, in the data model, we have a Name property for the customer. For, the validation we have used DataAnnotationd [Required, StringLength(100)]. This will make this Name property required and restrict its value up to the 100 character.As we are creating the CRUD operations, we’ll first start with the Create. Add a new Razor page as shown below:
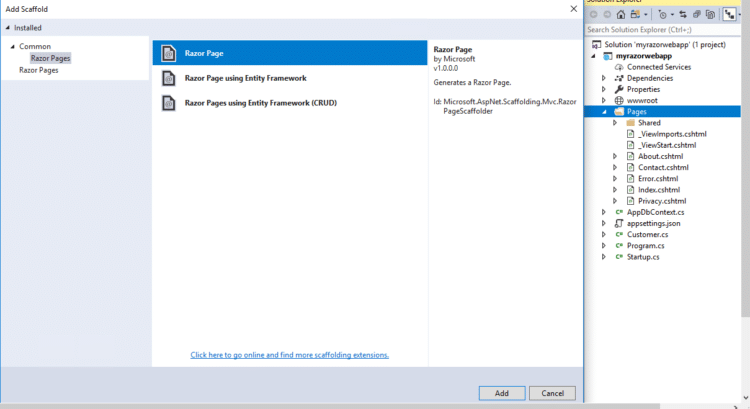
This will popup the below window from where we can give the name of our Razor page and select the options.
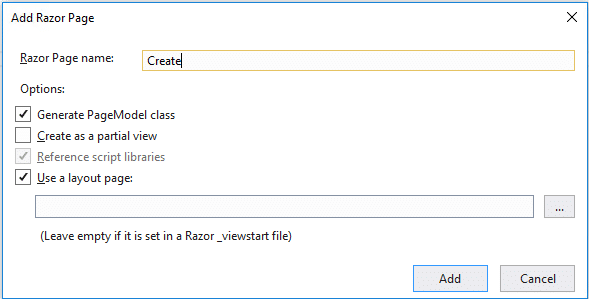
This will give us page with blank model as we have opted out for page model.
The Pages/Create.cshtml view file:
@page
@model myrazorwebapp.Pages.CreateModel

@{
    ViewData["Title"] = "Create";
}

<h3>Create</h3>
<h2>Enter Customer Name:</h2>
<form method="POST">
    <div>Name: <input asp-for="Customer.Name" /> </div>
    <input type="submit" />
</form>
The Pages/Create.cshtml.cs page model:
using System;
using System.Collections.Generic;
using System.Linq;
using System.Threading.Tasks;
using Microsoft.AspNetCore.Mvc;
using Microsoft.AspNetCore.Mvc.RazorPages;

namespace myrazorwebapp.Pages
{
    public class CreateModel : PageModel
    {
        private readonly AppDbContext _db;
        public CreateModel(AppDbContext db)
        {
            _db = db;
        }

        [BindProperty]
        public Customer Customer { get; set; }
        public async Task OnPostAsync()
        {
            // Validate the input data
            if (!ModelState.IsValid)
            {
                return Page();
            }
            _db.Customers.Add(Customer);
            await _db.SaveChangesAsync();
            return RedirectToPage("/Index");

        }
    }
}
By convention, the PageModel class is called <PageName>Model and is in the same namespace as the page.
The PageModel class allows separation of the logic of a page from its presentation. It defines page handlers for requests sent to the page and the data used to render the page. This separation allows you to manage page dependencies through dependency injection and to unit test the pages. The page has an OnPostAsync handler method, which runs on POST requests (when a user posts the form).
You can add handler methods for any HTTP verb. The most common handlers are:
The Async naming suffix is optional but is often used by convention for asynchronous functions. The OnPostAsync code in the preceding example looks similar to what you would normally write in a controller. The preceding code is typical for Razor Pages. Most of the MVC primitives like model binding, validation, and action results are shared.
The basic flow of OnPostAsync:
public async Task<IActionResult> OnPostAsync()
        {
            // Validate the input data
            if (!ModelState.IsValid)
            {
                return Page();
            }
            _db.Customers.Add(Customer);
            await _db.SaveChangesAsync();
            return RedirectToPage("/Index");

        }
Check for validation errors.
When the data is entered successfully, the OnPostAsync handler method calls the RedirectToPage helper method to return an instance of RedirectToPageResult. RedirectToPage is a new action result, similar to RedirectToAction or RedirectToRoute, but customized for pages. In the preceding sample, it redirects to the root Index page (/Index). RedirectToPage is detailed in the URL generation for Pages section.
When the submitted form has validation errors (that are passed to the server), the OnPostAsync handler method calls the Page helper method. Page returns an instance of PageResult. Returning Page is similar to how actions in controllers return View. PageResult is the default return type for a handler method. A handler method that returns void renders the page.
The Customer property uses [BindProperty] attribute to opt in to model binding.
[BindProperty]
public Customer Customer { get; set; }
Razor Pages, by default, bind properties only with non-GET verbs. Binding to properties can reduce the amount of code you have to write. Binding reduces code by using the same property to render form fields (<input asp-for=”Customer.Name” />) and accept the input.
The home page (Index.cshtml):
@page
@model IndexModel
@{
    ViewData["Title"] = "Customer List";
}

<div class="col-md-12">
    <form method="post">
        <div class="table">
            <!-- Table header section -->
            <div>
                <div class="col-md-3">ID</div>
                <div class="col-md-7">Name</div>
                <div class="col-md-2">Action</div>
            </div>
            <div>
                @foreach (var customer in Model.Customers)
                {
                    <div class="col-md-3">@customer.Id</div>
                    <div class="col-md-7">@customer.Name</div>
                    <div class="col-md-2">
                        <a asp-page="./Edit" asp-route-id="@customer.Id">edit</a>
                        <button type="submit" asp-page-handler="delete"
                                asp-route-id="@customer.Id">
                            delete
                        </button>
                    </div>
                }

            </div>
        </div>
        <a asp-page="./Create">Create</a>
    </form>
</div>
The associated PageModel class (Index.cshtml.cs):
using System;
using System.Collections.Generic;
using System.Linq;
using System.Threading.Tasks;
using Microsoft.AspNetCore.Mvc;
using Microsoft.AspNetCore.Mvc.RazorPages;
using Microsoft.EntityFrameworkCore;

namespace myrazorwebapp.Pages
{
    public class IndexModel : PageModel
    {
        private readonly AppDbContext _db;
        public IndexModel(AppDbContext db)
        {
            _db = db;
        }
        public IList<Customer> Customers { get; private set; }
        public async Task OnGetAsync()
        {
            Customers = await _db.Customers.AsNoTracking().ToListAsync();
        }

        public async Task<IActionResult> OnPostDeleteAsync(int Id)
        {
            var customer = await _db.Customers.FindAsync(Id);
            if (customer != null)
            {
                _db.Customers.Remove(customer);
                await _db.SaveChangesAsync();
            }
            return RedirectToPage();
        }
    }
}
The Index.cshtml file contains the following markup to create an edit link for each contact:
<a asp-page=" ./Edit" asp-route-id="customer.Id">edit</a>
The Anchor Tag Helper used the asp-route-{value} attribute to generate a link to the Edit page. The link contains route data with the contact ID. For example, http://localhost:5000/Edit/1.
The Pages/Edit.cshtml file:
@page "{Id:int}"
@model myrazorwebapp.Pages.EditModel
@{
    ViewData["Title"] = "Edit";
}

<h2>Edit Customer - @Model.Customer.Name</h2>
<form method="post">
    <div asp-validation-summary="All"></div>
    <input asp-for="Customer.Id" type="hidden" />
    <div>
        <label asp-for="Customer.Name"></label>
        <div>
            <input asp-for="Customer.Name" />
            <span asp-validation-for="Customer.Name"></span>
        </div>
    </div>

    <div>
        <button type="submit">Save</button>
    </div>
</form>
The first line contains the @page “{id:int}” directive. The routing constraint”{id:int}” tells the page to accept requests to the page that contain int route data. If a request to the page doesn’t contain route data that can be converted to an int, the runtime returns an HTTP 404 (not found) error. To make the ID optional, append ? to the route constraint:
@page "{id:int?}"
The Pages/Edit.cshtml.cs file:
using System;
using System.Collections.Generic;
using System.Linq;
using System.Threading.Tasks;
using Microsoft.AspNetCore.Mvc;
using Microsoft.AspNetCore.Mvc.RazorPages;
using Microsoft.EntityFrameworkCore;

namespace myrazorwebapp.Pages
{
    public class EditModel : PageModel
    {
        private readonly AppDbContext _db;
        public EditModel(AppDbContext db)
        {
            _db = db;
        }

        [BindProperty]
        public Customer Customer { get; set; }

        public async Task<IActionResult> OnGetAsync(int id)
        {
            Customer = await _db.Customers.FindAsync(id);

            if (Customer == null)
            {
                return RedirectToPage("/Index");
            }
            return Page();
        }

        public async Task<IActionResult> OnPostAsync()
        {
            if (!ModelState.IsValid)
            {
                return Page();
            }
            _db.Attach(Customer).State = EntityState.Modified;
            try
            {
                await _db.SaveChangesAsync();
            }
            catch (DbUpdateConcurrencyException)
            {
                throw new Exception($"Customer {Customer.Id} not found!");
            }
            return RedirectToPage("/Index");
        }
    }
}
The Index.cshtml file also contains markup to create a delete button for each customer contact:
<button type="submit" asp-page-handler="delete"
        asp-route-id="@customer.Id">
    delete
</button>
When the delete button is rendered in HTML, its formaction includes parameters for:
• The customer contact ID specified by the asp-route-id attribute.
• The handler specified by the asp-page-handler attribute.
Here is an example of a rendered delete button with a customer contact ID of 1:
<button type="submit" formaction="/?id=1&handler=delete">delete</button>
When the button is selected, a form POST request is sent to the server. By convention, the name of the handler method is selected based the value of the handler parameter according to the scheme OnPost[handler]Async.
Because the handler is delete in this example, the OnPostDeleteAsync handler method is used to process the POSTrequest. If the asp-page-handler is set to a different value, such as remove, a page handler method with the name OnPostRemoveAsync is selected.
public async Task<IActionResult> OnPostDeleteAsync(int Id)
        {
            var customer = await _db.Customers.FindAsync(Id);
            if (customer != null)
            {
                _db.Customers.Remove(customer);
                await _db.SaveChangesAsync();
            }
            return RedirectToPage();
        }
The OnPostDeleteAsync method:
• Accepts the id from the query string.
• Queries the database for the customer contact with FindAsync.
• If the customer contact is found, they’re removed from the list of customer contacts. The database is updated.
• Calls RedirectToPage to redirect to the root Index page (/Index).
Now, as we did the complete code for CRUD operations, to check, run the application and that will lead you to the default Index page as below.
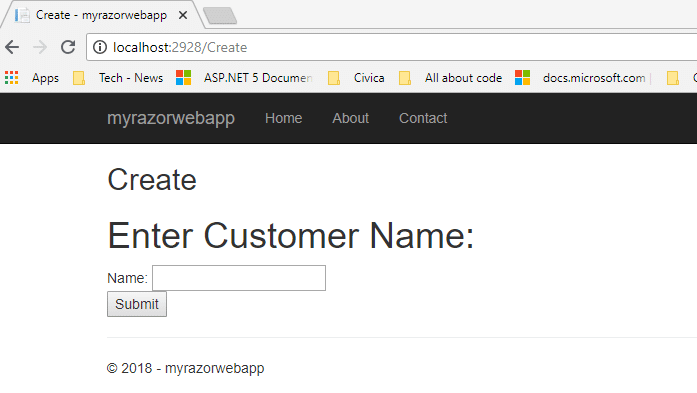
Enter the name, that will add record to the InMemory DbContext and shows list of records as below.
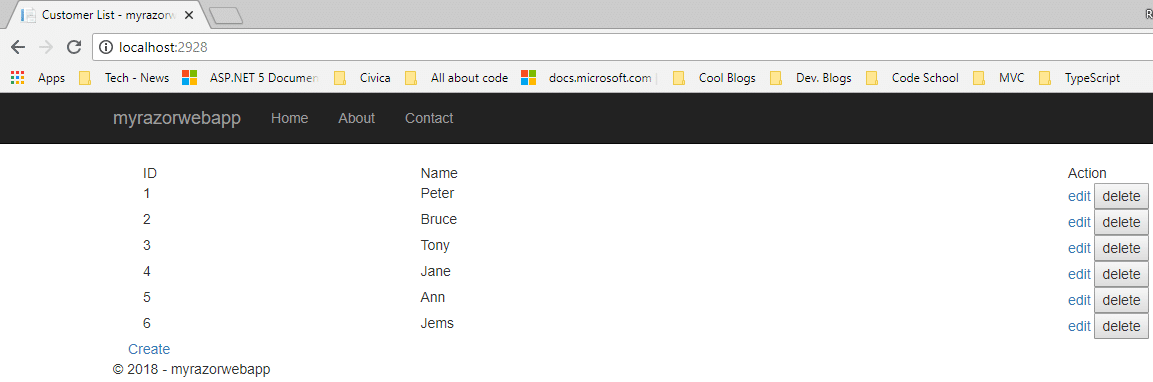
User can edit or Delete the records from this list.
With this tutorial, we’ve seen how to implement CRUD operations in an ASP.NET Core development services. If you face any issue while following these steps, you can hire dedicated .NET developers
for help.
Get a free copy of CRUD Operations ASP.NET Core Demo at Github.
Our team is always eager to know what you are looking for. Drop them a Hi!

Pranjal Mehta is the Managing Director of Zealous System, a leading software solutions provider. Having 10+ years of experience and clientele across the globe, he is always curious to stay ahead in the market by inculcating latest technologies and trends in Zealous.


I like the helpful information you provide in your articles.
I’ll bookmark your weblog and check again here frequently.
I am quite certain I will learn plenty of new stuff right here!
Best of luck for the next!